Importance of fern propagation in Gardening
Gardening offers a rewarding way to connect with nature and enhance your living spaces. One vital aspect of this hobby is fern propagation. Growing ferns can bring lush greenery to both indoor and outdoor settings. As a homeowner or a gardening enthusiast, you might be delighted to know that these resilient plants are perfect for various environments.
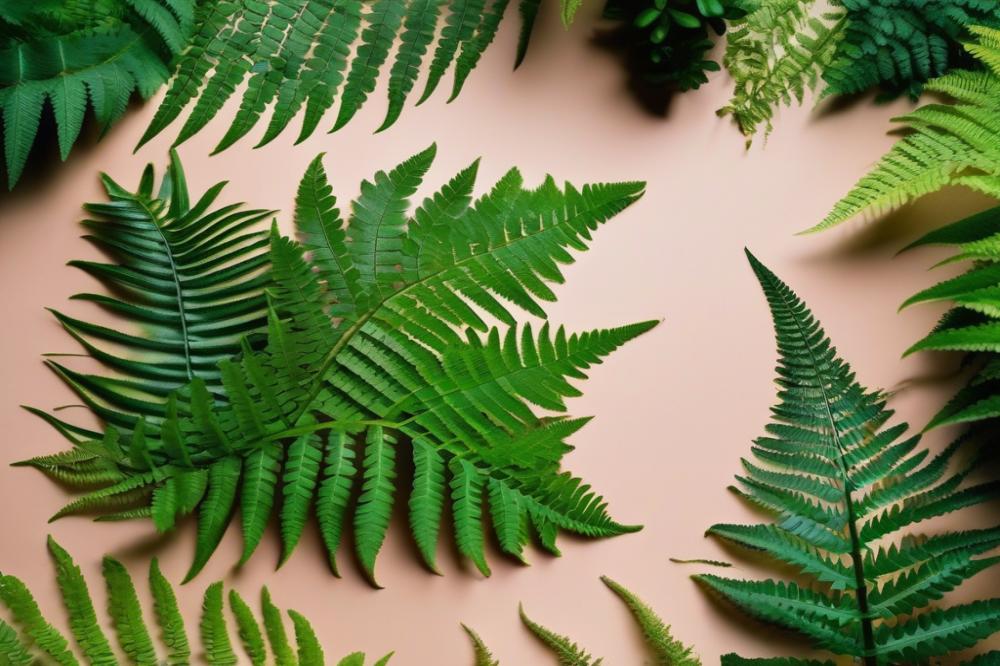
Ferns as Indoor and Outdoor Plants

Ferns flourish in a range of conditions, making them adaptable for many settings. Indoor plants like ferns can improve air quality and add an elegant touch to your home decor. On the other hand, outdoor ferns create stunning landscapes, providing a natural aesthetic. These plants offer unique textures and intricate leaf patterns that enhance any garden.
Benefits of Propagating Ferns Through division

Dividing ferns is a straightforward method to propagate these lovely plants. This technique supports healthy growth by allowing excess roots to develop better. Splitting root systems ensures that each new plant receives adequate nutrients. It is not only an excellent way to expand your collection but also crucial for maintaining plant health.
Moreover, ferns care becomes easier when they are regularly divided. Timing your division can contribute to successful repotting ferns. If you follow gardening tips carefully, you will see your ferns thrive, whether indoors or outside. Embracing this division method provides an opportunity to explore various propagation methods and share your ferns with friends and family.
Understanding Fern Propagation

Fern propagation refers to the process of creating new ferns from existing ones. This can be done in a few different ways. Each method has its own benefits, making certain techniques more suitable depending on the gardener’s needs.
There are several methods when it comes to propagating ferns. Spores can be collected and planted, although this method can be quite tricky for beginners. Another option is taking cuttings from a fern and allowing them to root in water or soil. Yet, many gardeners prefer the method of division. This technique involves carefully splitting the fern into smaller sections, each with its own root system.
Choosing to divide ferns has several advantages. For one, it is a straightforward approach that supports healthy plant care. Dividing ferns also encourages new growth, which boosts both plant health and vitality. Gardeners enjoy the opportunity to freshen up outdoor ferns and give indoor plants more room to thrive. In addition, this method allows for repotting ferns into separate pots, making it easier to care for each plant individually.
When you decide to propagate through division, timing is essential. Split ferns during the growing season for the best results, as this enhances their ability to recover. Overall, the ease of dividing ferns makes this method appealing for many plant enthusiasts, whether they’re tending to houseplants or outdoor varieties.
Choosing the Right Time for Division

Best Seasons for Dividing Ferns
Timing is crucial when dividing ferns. The best seasons for this task are spring and early fall. During these periods, ferns are actively growing. This results in a more successful transition after you divide them. Spring offers fresh growth, while early fall allows for root establishment before winter. Gardeners often find these times most favorable for ensuring the plant thrives post-division.
Signs That a Fern is Ready for Division
Recognizing when to divide a fern is essential. Signs include crowded or overgrown root systems. If you notice ferns pushing against the sides of their pots, they may need more space. Faded foliage or decreased growth can also indicate an urgent need for repotting. Healthy plants display lush fronds, but when they look sparse, it may be time to separate them. Observing your indoor plants regularly helps catch these signs early.
Effects of Timing on Plant Health and Growth
Timing affects both the health of the plant and its future growth. Dividing ferns at the wrong time may shock them. This shock can lead to wilting or even death in extreme cases. On the other hand, proper timing promotes healing and strong root development. Healthy division allows the plants to bounce back quickly. Following these gardening tips will enhance your ferns care routine. Consider your region’s climate to choose the right moment for dividing ferns. A little patience goes a long way in ensuring the best outcomes for your outdoor and indoor ferns.
Preparing for Division
Tools Needed for Dividing Ferns
Before you start dividing ferns, gather a few essential tools. You will need a sharp, clean garden spade or trowel. Scissors or a knife might also be useful for cutting through tough roots. A container for new divisions is necessary, especially if you plan to repot them. Gloves are truly helpful, as they protect your hands while handling soil and plants. Having watering cans handy is beneficial for keeping plants hydrated after division. Lastly, don’t forget your gardening shears; they’re great for trimming fronds if needed.
Assessing the Root System
Assessing the root system is crucial before you begin the division process. Start by gently lifting the fern from its pot or the ground. Be careful not to damage the roots. Examine the root ball for signs of health. Healthy roots are usually white or light tan and firm to the touch. If you see mushy or black roots, that’s an indication of rot. Good roots indicate readiness for propagation methods like division. Identify natural separations in the root system. This can guide you on where to cut, making for easier divisions.
Tips for Proper plant care Before and After Division
Prior to dividing, proper plant care is essential for success. Ensure that your ferns are well-watered a few days before you plan to divide them. This helps the roots stay moist and lessens stress during the process. If the ferns are indoor plants, keep them in indirect light to avoid shock. Post-division care is important too. After dividing ferns, place each new section in its own pot with fresh soil. Water them gently but thoroughly. During the first few weeks, monitor the health of the plants closely. Keep them in a warm location with adequate light but avoid direct sun. Using a diluted fertilizer can also help boost growth after repotting ferns. Follow these gardening tips to support the rejuvenation of your plants.
The Division Process
Dividing ferns can seem challenging, but it is a rewarding task. Follow this step-by-step guide to make the process smoother.
Step-by-Step Guide to Dividing Ferns
Start by selecting a healthy fern that has grown large enough. This plant should have multiple fronds and a robust appearance. Gather essential tools, including a sharp spade, pruning shears, and a clean potting mixture. Make sure these are ready before beginning.
Next, water the fern a day or two before division. This helps hydrate the plant and makes it easier to separate the roots. After ensuring the plant is well-hydrated, carefully remove it from its pot. Gently shake off the excess soil to expose the roots.
Look for natural divisions within the root ball. These divisions will usually appear as clusters of roots and fronds that can be split apart. Use the spade or shears to cut through the roots carefully. Try to make each division have some roots attached. This promotes strong growth for the new plants.
How to Properly Separate Ferns Into New Plants
To further separate the ferns, gently pull apart the root systems. Avoid forcing them apart, as this can damage the roots. It is critical to maintain as much of the root system as possible during this process. Healthy roots increase the chances that the new plants will thrive.
Once you have divided the ferns, it’s time for repotting. Use fresh potting soil to provide nutrients for your new plants. Make small holes in new pots for the ferns, then place each division into the holes and cover the roots with soil. Press down gently to secure them.
Maintaining a Healthy Root System During Division
Protecting the roots during this delicate process is essential. A strong root system helps the plants establish themselves in their new pots. Avoid breaking any roots, as this can lead to stress and poor growth in your ferns care.
After repotting, water the new ferns thoroughly. Keep the soil consistently moist but not soggy. Monitor their growth for the following weeks. Offering adequate light and temperature is vital for indoor plants. Observe how they adapt to their new environment.
Applying good plant care practices will support the health of the ferns. Be attentive to their needs, whether they are outdoor ferns or indoor varieties. Patience is the key. With time, your divided ferns will grow beautifully.
Repotting and Caring for Divided Ferns
Best Soil and Potting Techniques for Repotting Ferns
When repotting ferns, use a well-draining potting mix designed for indoor plants. A blend of peat, perlite, and pine bark works well. These components help create an airy environment for the roots to thrive. Make sure the new pot has drainage holes to prevent water from pooling. Gently remove the divided fern from its old pot, shaking off excess soil around the root system. Place it into the new pot and fill with fresh mix, leaving a little space at the top for watering. Give the newly potted ferns a good drink after repotting to help settle the roots.
Indoor vs Outdoor Ferns Care Post-Division
The care for indoor and outdoor ferns varies after division. Indoor plants often need bright, indirect light. Monitor them for humidity, as ferns prefer moist air. Misting can help, or you might consider a humidity tray. Outdoor ferns, however, appreciate dappled sunlight and some shade during the hottest part of the day. Keep the soil evenly moist but not soggy. Be mindful of the weather; protect them from strong winds or harsh sunlight as they adjust to their new surroundings.
Essential Gardening Tips for Maintaining Plant Health After Propagation
After dividing ferns, attention to detail is crucial. Check moisture levels regularly to avoid drying out the soil. Look for signs of stress, such as drooping leaves or discoloration. Fertilizing lightly during the growing season can encourage new growth. Use a balanced liquid fertilizer diluted to half strength. Patience is key. Newly divided plants may take some time to adjust. Sharing space with other greenery can provide a comforting environment. Stay diligent with your plant care routine. Over time, these divided ferns will flourish with proper attention and care.
Common Challenges and Solutions
Many gardeners encounter various issues when dividing and repotting ferns. A common challenge is the stress placed on the plant. Dividing ferns can sometimes shock them, leading to wilted fronds or stunted growth. The root system may also be damaged during the process. Checking for healthy roots is vital. If they seem dried out or broken, the plant may struggle to recover.
Water is a crucial element for freshly divided ferns. Keeping the soil moist helps maintain plant health. Skipping this step may cause stress, leading to more problems down the line. It’s important to monitor the moisture level closely. Adding a layer of mulch can help retain moisture during the recovery phase.
Troubleshooting Tips for Divided Ferns
Sometimes, even with proper care, issues can arise. Yellowing leaves are often a sign of nutrient deficiency or overwatering. Adjusting the watering schedule can improve plant care. If the fronds are browning at the tips, this may indicate low humidity levels. Providing extra moisture can help the plants thrive. In dry indoor environments, consider misting the ferns occasionally.
Another issue could be inadequate light. Most outdoor ferns thrive in partial shade. Ensure your ferns are located where they receive filtered sunlight. If their environment is too dark, growth will be slow, and the ferns may appear lackluster.
Maintaining Optimal Conditions for Recovery and Growth
For successful recovery after division, the right environment is crucial. Indoor plants benefit from humidity trays or pebble trays filled with water. This setup allows moisture to rise around the leaves, mimicking a natural habitat. Outdoor ferns require attention to seasonal changes. During the cooler months, wrapping the base in burlap can protect them from frost.
Repotting ferns gives them room to grow. Use well-draining soil and the right pot size. This allows the roots to expand while receiving proper drainage. Fertilizing should be done sparingly at first. Starting with a diluted solution encourages healthy growth without overwhelming the plant. Observing their recovery closely will provide hints about their ongoing needs.
Patience is essential during this whole process. Plants take time to adjust after undergoing a significant change. Regular observation will help identify any new challenges. Taking notes on their response to various conditions can be beneficial in refining your gardening tips. Remember, healthy ferns will reward you with lush growth and beautiful foliage.
Final Thoughts on Propagating Ferns Through Division
Recapping the significance of dividing ferns highlights how this process can rejuvenate your plants. Through division, you not only multiply your collection but also promote healthier growth. Healthy plants thrive better. They become fuller and more vibrant. Sharing ferns with friends or expanding your garden is always rewarding.
You should definitely give this method a try at home. With a little practice, success is within reach. Watching your ferns grow and flourish becomes a gratifying experience. Engaging with nature through propagation can also be incredibly peaceful. Moreover, it provides an opportunity to learn about the unique needs of these fascinating plants.
As you embark on your fern propagation journey, remember some essential tips for ongoing plant care. Water them wisely, avoiding over or under-watering. A well-drained soil mix will help prevent root rot. Placing ferns in adequate light is equally important. Most varieties love indirect sunlight. Lastly, feeding them with a balanced fertilizer during the growing season can greatly enhance their health.
With these simple gardening tips in mind, you are now prepared to propagate and nurture your ferns. Enjoy the process, and happy gardening!