Understanding the Value of composting
composting plays a vital role in sustainable gardening, offering a way to turn organic waste into valuable fertilizer. Many gardeners embrace compost to nourish their plants while reducing waste. It’s a simple process, yet it creates a significant impact on the environment.
Consider the benefits of a homemade compost tumbler. With just a little effort, you can create a system that accelerates decomposition. Tumbling composters allow you to recycle kitchen scraps and yard debris more efficiently. They mix materials thoroughly, which speeds up the breakdown process. This means you can produce rich, garden compost faster than with traditional methods.
This article will guide you through the steps to build a compost tumbler. You’ll discover the essential composting tips and the materials needed for construction. By the end, you will have the knowledge to create a functional DIY compost bin that enhances your backyard composting efforts. Join us on this journey to transform your organic waste into a resource that benefits both your garden and the planet.
Understanding the homemade compost tumbler
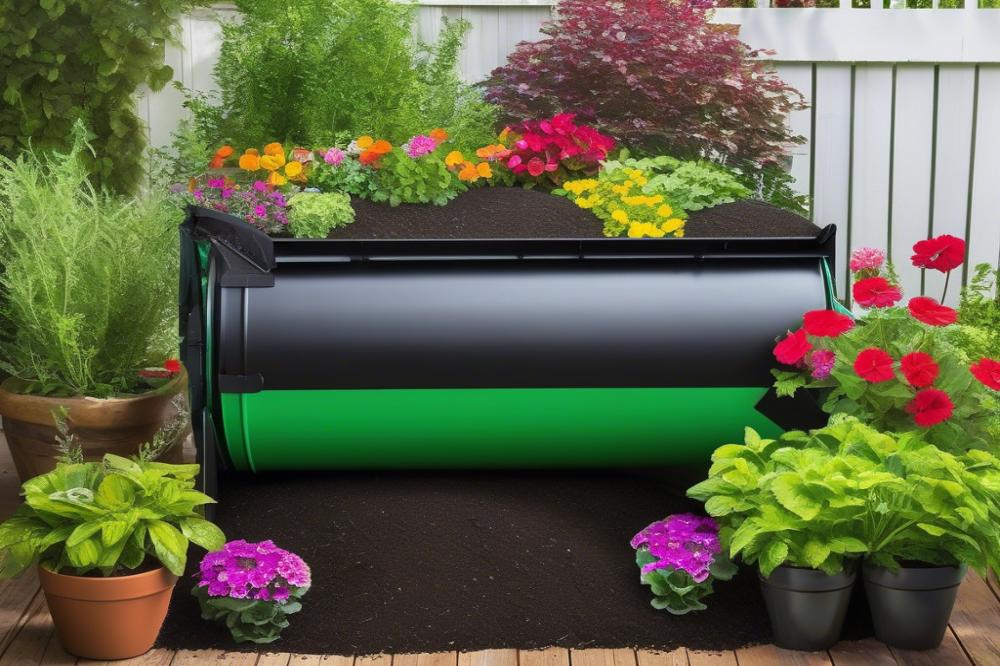

A compost tumbler is a rotating bin designed to speed up the composting process. Unlike stationary options, it allows you to mix materials easily. This movement creates a perfect environment for organic waste to break down efficiently. Tumbling composter systems encourage air circulation, which is essential for healthy decomposition. You get high-quality garden compost faster.
Choosing a DIY compost bin offers several benefits over traditional bins. First, it reduces the time required to produce rich compost. Since you can easily turn the bin, it promotes even breakdown of materials. Aeration helps prevent unpleasant odors and pests. That means less hassle and more efficient recycling of kitchen scraps. Enthusiastic gardeners can produce nutritious compost right in their backyards.
When it comes to compost materials, some items work best in a tumbler. Fresh greens like fruit peels, vegetable scraps, and grass clippings provide essential nitrogen. Brown materials such as dried leaves, cardboard, and straw add crucial carbon. Combining these types creates the ideal balance for composting. Avoid putting in meats, dairy, or oily foods, as they can attract pests. Following these composting tips ensures successful growth of organic matter.
Your compost tumbler can handle a variety of materials. This diversity acts to accelerate the decomposition process. As a result, you’ll get nutrient-rich soil that can be used to enhance your garden. Recycling kitchen scraps and yard waste makes every bit count. With effort and care, the turning process transforms waste into a valuable resource for sustainable gardening.
Materials Needed for Your Homemade Compost Tumbler

Creating an efficient DIY compost bin is easier than you might think. You’ll need a few essential materials to get started. A sturdy barrel is the heart of your tumbling composter. Look for a plastic or metal container that is at least 55 gallons. This size works well for most backyard composting projects. If you plan to compost more, consider a larger size.
Next, think about how you will support your tumbler. A wooden or metal frame will keep your barrel steady during the tumbling process. You can easily build this frame using recycled materials or simple wood pieces. Ensuring it is elevated will make turning the barrel easier and prevent it from sitting directly on the ground.
Selecting the Right Size and Type of Barrel
When choosing your barrel, consider the amount of organic waste you plan to compost. A smaller tumbler might suit households with less kitchen waste while a larger one can handle a busier family’s needs. The type of barrel also matters. Opt for one with a lid to keep pests away and to help contain odors. Vented barrels allow for better airflow, which accelerates composting. Think carefully about what fits your yard and how often you will be adding materials.
Recycling Kitchen Scraps and Organic Waste Considerations
Almost everyone produces kitchen scraps, and these can be perfect for composting! Fruit and vegetable peels, coffee grounds, and eggshells are great additions. Remember to avoid meat, dairy, and oils, as these can attract unwanted animals. Mixing in yard waste like grass clippings and leaves will balance out your compost materials. This mixture is vital for achieving quality garden compost.
Always keep in mind the importance of a healthy composting process. Chopping larger scraps into smaller pieces can speed up decomposition. Mixing your materials regularly helps oxygen circulate, which is crucial for a successful compost. By following these composting tips, you can create a thriving composting system that benefits both your garden and the environment.
Step-by-Step Guide to Building Your DIY Compost Bin

Ready to dive into composting? Crafting your own tumbler will be fulfilling. Gather your materials first. For a basic design, you will need a large plastic barrel with a secure lid, wooden pallets or strong posts, and bolts or screws for stability.
Start by cutting the barrel. Make holes along the sides for aeration. Proper airflow is crucial for effective composting. Without it, your organic waste won’t break down properly. Drill or cut at least ten holes, each about one inch in diameter. Remember, the more air, the better the compost!
Next, build the frame. Use the wooden pallets or posts to create a sturdy base. This base should elevate the tumbler off the ground, promoting drainage. Attach the barrel securely to this frame. Bolts work best if you’re looking for a stable fit. Now it’s time to incorporate a rotating mechanism.
To make tumbling easier, add pipe clamps. These keep the barrel in place while allowing you to spin it. Alternatively, install a simple axle system using a metal rod. Make sure the tumbler rolls smoothly and effortlessly. Having a properly functioning tumbler will make adding compost materials much less tedious.
After constructing the tumbler, pay attention to drainage. Waterlogged compost is not ideal. Drill additional small holes in the bottom of the barrel. This will help excess moisture escape, preventing a foul odor.
When you start adding organic waste, use a mix of browns and greens. This balance is key for healthy composting. Incorporating kitchen scraps, dried leaves, and grass clippings encourages decomposition. Keep an eye on the moisture level. If it feels too wet, mix in some dry materials.
For best composting tips, remember to tumble regularly. Rolling the composter every couple of days promotes even mixing. Not only will this speed up decomposition, but it also prevents clumping.
Finally, embrace trial and error. Every composting experience teaches something new. Don’t hesitate to adjust your design, add more holes, or even try different compost materials. This project can be as simple or complex as you wish. Happy composting!
Operating Your Homemade Compost Tumbler
Best Practices for Loading Materials
Loading materials into your tumbling composter is simple, but there are a few key points to remember. Start with small pieces of organic waste. This helps them break down faster. Layering the materials is essential. Mixing kitchen scraps with yard waste creates a balanced environment. Avoid loading in too much of one type of material at once. A good mix will give you a healthy compost.
Maintaining Balance of Greens and Browns in Composting
Achieving the right balance of greens and browns is crucial for successful composting. Greens include nitrogen-rich items like fruits, vegetables, and grass clippings. Browns are carbon-based materials such as dried leaves and shredded paper. Aim for a ratio close to 2:1, with more browns than greens. This mix provides the nutrients your backyard compost needs. Monitor your compost regularly. If it smells bad or sees excess moisture, adjust the ratio accordingly.
Composting Tips for Optimal Decomposition
Composting becomes more effective with a few simple tips. Turn your compost tumbler every few days. This aeration speeds up the decomposition process. Monitor the moisture content as well. Too much dampness can lead to odors. If it feels too wet, add some dry, brown materials to balance it out. Use a thermometer to check the heat of the compost. The right temperatures signal that the process is working. Remember to be patient; healthy composting takes time, but the results are definitely worth it!
Troubleshooting Common Issues
Composting offers many benefits, but it’s not always a smooth ride. Odors can sometimes waft from your homemade compost tumbler. If you notice a bad smell, your compost may be too wet or not aerated enough. Mixing in dry materials like shredded paper or straw can help balance excess moisture. This trick will also provide a better mix for your kitchen scraps and organic waste.
Pests can be another pesky problem. Fruit flies and rodents are often attracted to compost bins with too much food waste. To discourage these visitors, avoid putting in meat, dairy, or oily foods. Keeping your DIY compost bin sealed well and turning it regularly will also help manage pests.
Moisture levels can be tricky. Your compost should have the texture of a damp sponge. If it feels too dry, add water gradually. Tumbling frequently can help distribute moisture evenly. On the other hand, if it’s too soggy, mix in some dry brown materials to soak up the excess. Adjusting these factors will help foster a healthy environment for composting.
Tips for Different Climates and Seasons
Your climate can influence how you compost. In hot weather, the process speeds up, and it may require more frequent turning. During colder months, composting can slow down. Covering your garden compost or tumbling composter with a tarp can trap warmth and moisture, helping decomposing bacteria stay active.
Season changes can also impact moisture levels. Rainy days may mean your backyard composting gets too wet. In contrast, dry spells may cause it to dry out. Always adjust your tumbling habits accordingly. Keep a close eye on your compost materials for the best results.
Explore these composting tips to create a successful system. Remember, patience and observation are key to resolving issues. Composting needs time, and adapting to your environment will lead to better results. With a few simple adjustments, you’ll be well on your way to producing rich, organic compost.
Harvesting and Using Your Compost
Signs Your Compost is Ready to Use
After a few weeks of turning and mixing, your compost will start changing. Look for a dark, crumbly texture; this is one sign that it’s ready. A pleasant, earthy smell is another indicator. If it still has recognizable food scraps or yard waste, give it more time. Those materials should break down completely. The ideal finished product resembles rich, dark soil.
Methods for Retrieving and Storing Compost
When it comes time to harvest, you’ll want to make the process easy. Start by locating the composting area in your tumbling composter. Use a pitchfork or shovel to extract the finished compost from the bottom. You may find it helpful to wear gloves during this task. After retrieval, store the compost in a dry, cool place. Using containers like old buckets or storage bins works well. Keeping your compost sealed will reduce odors and pests.
Applications of Garden Compost in Sustainable Gardening
Applying compost in your garden has many benefits. Enriching garden soil with compost improves its structure. This helps retain moisture and promote healthy plant growth. You can also use garden compost as a natural fertilizer, providing essential nutrients to plants. Adding a layer of compost around your plants can suppress weeds as well. By recycling kitchen scraps and organic waste, you contribute to sustainable gardening practices. Whether in flower beds, vegetable plots, or potted plants, compost serves multiple purposes. It ties back into the rhythm of nature, completing the cycle of growth and decay.
Final Thoughts on Composting
Building your own compost tumbler offers numerous advantages. You gain a convenient way to recycle kitchen scraps and yard waste. This process reduces garbage output and provides rich soil for your garden. Additionally, it saves money on store-bought fertilizers. When you create a DIY compost bin, you take a step toward sustainable living.
Getting started with backyard composting is easier than you might think. Everyone can start this rewarding practice. A small effort leads to significant rewards. Imagine turning waste into beneficial compost. It’s a simple process that benefits both you and your plants.
Involving yourself in composting is a meaningful way to contribute to the environment. By reducing landfill waste, you help decrease harmful emissions. Your small actions can lead to substantial change. Together, we can improve soil health and promote biodiversity. Each compost pile cultivates a healthier planet for future generations.
In summary, a homemade compost tumbler can transform organic waste into a valuable resource. Take the plunge into composting and witness its positive effects. Your garden, community, and the Earth will thank you!

