Introduction
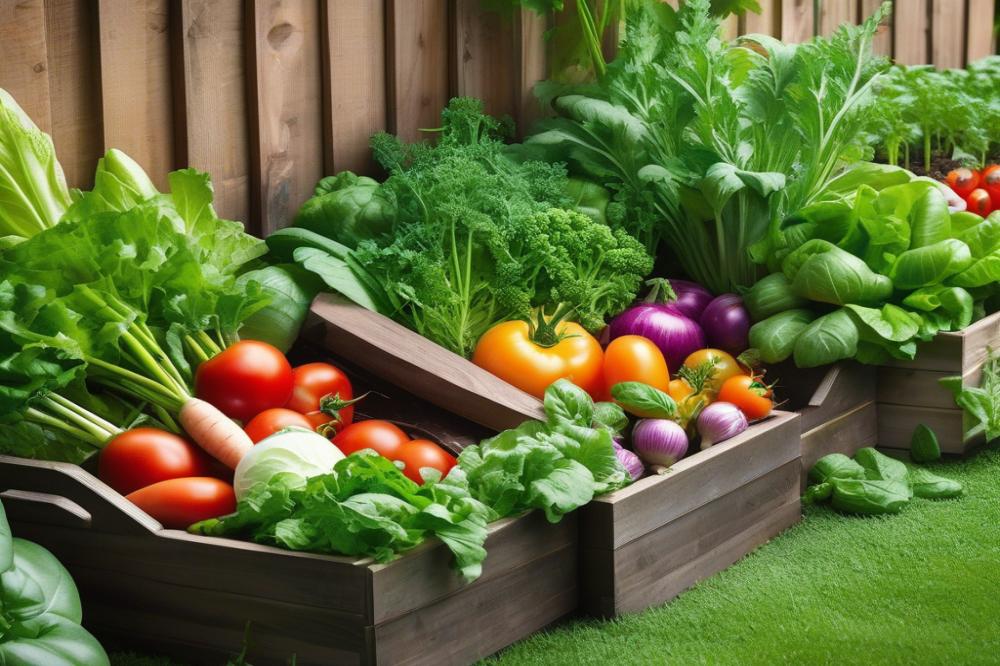
chili plants are a favorite among home gardeners. Saving seeds from these peppers offers a bounty of benefits for sustainable gardening practices. By reusing seeds each season, gardeners can cultivate a garden that thrives and adapts over time. This practice promotes biodiversity and resilience in our food systems.
Heirloom seeds are particularly important when discussing chili varieties. These seeds come from plants that have been passed down through generations, boasting unique flavors and characteristics. By focusing on heirloom options, gardeners can preserve the rich history of these plants while enhancing their vegetable gardening experience.
Throughout this article, we will cover essential gardening tips related to seed storage, plant propagation, and the overall art of saving chili seeds. We will highlight effective seed saving techniques to help you cultivate your garden sustainably. Emphasizing organic gardening methods will further promote healthy growth for your chili plants and beyond. Let’s dive into the world of seed saving and enrich your home gardening journey!
How to save chili seeds

Saving seeds from your chili plants is a rewarding process that lets you continue enjoying your favorite peppers year after year. When deciding which fruits to use, consider the ripeness of the chili. Overripe fruits usually hold the best seeds. They should be vibrant in color and slightly soft to the touch. Healthy seeds come from robust, mature plants.
Next, think about the variety of chili. If you grow different types of peppers, be cautious. Cross-pollination can occur, especially in close proximity. This can affect the traits of the new plants you grow. For those interested in preserving traits, heirloom seeds are excellent choices. They often retain specific flavors and characteristics over generations.
Now, let’s dive into the extraction process. Start with a chosen ripe chili. Cut it open carefully. Inside, you will find seeds surrounded by fleshy pulp. To extract the seeds, gently scrape them out using a spoon. This method works well for many chili varieties. If you have larger peppers, such as jalapeños, slicing them lengthwise can be effective too.
After extraction, it’s time for cleaning. Rinse the seeds under cool water to remove any remaining pulp. This step is crucial. Any leftover organic material can encourage mold during storage.
Once cleaned, the drying process begins. Spread the seeds on a paper towel or a clean plate. Make sure they have enough space and do not touch each other. Allow them to dry for several days in a warm, dry spot, away from direct sunlight. A well-ventilated area works best.
Store your dried seeds properly. Use envelopes or small containers. Label them with the variety name and the year saved. For optimum longevity, consider placing them in a cool, dark place. A refrigerator works well for seed storage. This helps maintain the quality of the seeds until planting season.
In home gardening, focusing on sustainability is essential. Saving chili seeds contributes to organic gardening practices. It reduces the need to buy new seeds every year. Moreover, plant propagation becomes much easier when you have a stash of your favorite varieties ready to go. gardening tips like these will improve your overall vegetable gardening experience. With some care, you can look forward to bountiful harvests in the seasons to come.
Drying and Cleaning Seeds

Cleaning and drying seeds is crucial for successful storage. Proper techniques can help keep your chili varieties viable for the next season. If you want to preserve heirloom seeds, attention to detail is key.
To start, collect the seeds from your chili plants once the fruits are fully ripe. It’s best to wait until the peppers are at their peak color. After harvesting, slice the fruits open carefully. Scoop out the seeds with a spoon or knife.
Next, it’s time to clean those seeds. Remove as much of the pulp as you can. Rinse the seeds gently under cool water. Using a fine mesh strainer can be helpful here. Any leftover pulp can rot and affect the seeds’ health.
After cleaning, the seeds need to dry. Spread them out on a clean paper towel or a plate. Make sure they are in a single layer. You want air to circulate freely around each seed. Set them in a warm, dry area, away from direct sunlight. This process can take several days, so be patient.
Once the seeds are dry, check for any remaining debris. Even small bits of pulp can cause issues when it comes to long-term seed storage. Gently rub each seed to remove any stubborn pieces. This step is essential for maintaining their quality.
In addition, consider labeling your seeds before storage. Knowing the specific chili varieties you have will help you when planting time comes around. Use small envelopes or containers that protect them from moisture. Sealability is important to keep them safe.
Utilizing sustainable practices in your home gardening can make a difference. Storing seeds properly promotes plant propagation for future seasons. Implement these gardening tips to enhance your vegetable gardening experience. It’s a simple, rewarding task that allows you to grow your garden without having to buy new seeds each year.
Seed Storage Methods

When you save seeds from chili plants, the way you store them makes a big difference in how well they sprout next season. Proper seed storage is essential for maintaining viability. Without good conditions, seeds can lose their ability to germinate, leading to disappointment in your garden.
Temperature is a key factor. Ideally, seeds should be kept in a cool place. Aim for a temperature around 50 to 70 degrees Fahrenheit. Avoid locations that get warm, like near radiators or in direct sunlight. Heat can damage the seeds, making them less effective. If you have a basement or a refrigerator, those may be excellent options for keeping seeds cool.
Humidity also matters greatly. Seeds thrive in low humidity environments. You might want to use a desiccant, like silica gel, to absorb excess moisture in your storage containers. This will help protect heirloom seeds from absorbing water, which could lead to mold or decay. Dry environments are your friend when it comes to seed preservation.
Exposure to light can also affect seed quality. Keeping seeds in a dark place will help maintain their integrity. Light can promote germination, which you want to avoid until planting time. Consider using opaque containers to block out light and create a safe environment for your seeds.
As for containers, a variety of options exist. Small glass jars, envelopes, or airtight containers work well. Glass jars are particularly useful because they can create a vacuum seal, preventing moisture from getting inside. For those who prefer reusability, sturdy plastic containers can also do the job, but make sure they are airtight.
Labeling your containers is important for easy identification of different chili varieties. Use waterproof pens or stickers that can withstand humidity. Write down both the type of chili and the date you harvested the seeds. This will help you track their age and ensure you plant the freshest seeds first. Keeping records can be very useful for home gardening enthusiasts.
By following these tips, you will set yourself up for successful plant propagation next season. Sustainable practices in vegetable gardening depend on proper preparation, and good seed storage is the first step. So take these gardening tips to heart and ensure a fruitful harvest next year.
Plant Propagation and Starting Seeds Indoors

Starting your chili seeds indoors is a fantastic way to get a jump on the growing season. By propagating from saved seeds, gardeners can enjoy multiple benefits. Heirloom seeds often provide unique flavors and resilience, making them ideal for home gardening. Begin by gathering the necessary equipment for success.
First, you will need seed-starting trays or pots. The size can vary, but small containers work best for individual seedlings. Seed starting mix is essential, too. This mix is lighter than regular soil, offering excellent drainage. A spray bottle for watering is helpful. Seed labels come in handy to track your different chili varieties.
When planting your seeds, remember that they need warmth to germinate. A sunny windowsill or grow lights will work well. Always keep the soil moist but not soggy. Too much water can lead to dampening off, a fungal disease that can kill seedlings. Give them enough light, around 12-16 hours a day. This will help them grow strong and healthy.
After a few weeks, it’s time to think about transplanting. When your seedlings develop their true leaves, they’ll be ready to move to larger pots. Choose pots that are about 3-4 inches wide. Carefully handle the seedlings, aiming to disturb their roots as little as possible. Fill the new pots with that same seed starting mix and create small holes for each seedling.
Once transplanted, keep an eye on the weather, especially if you plan for organic gardening. Gradually acclimatize your seedlings to outdoor conditions by placing them outside for a few hours each day. This process, known as hardening off, helps prevent shock when you finally move them to the garden.
Be mindful of your planting dates. Different chili varieties may have varying needs, so consult local gardening tips to find out the best planting time. This is a crucial step in vegetable gardening. By following these guidelines, you set the stage for a successful growing season. Enjoy the process, watch your seedlings thrive, and look forward to their delicious harvests.
Gardening Tips for Next Season
Planting your saved chili seeds can be an exciting adventure. Start with soil preparation. High-quality soil is essential for healthy growth. Use compost or well-rotted manure to enrich the earth. Mixing in organic material boosts the soil structure and nutrients. Consider testing your soil pH. Chili plants thrive in slightly acidic to neutral conditions, around 6.0 to 7.0.
Watering is another crucial factor in successful chili propagation. Young plants require consistent moisture but not sogginess. Aim to keep the soil damp, checking it frequently. Overwatering can lead to root rot, and chili varieties are particularly sensitive. Use mulch to help retain moisture and suppress weeds. Organic mulch from straw or wood chips works wonderfully.
When starting your seeds indoors, use biodegradable pots. This practice promotes root health and minimizes transplant shock. Fill these pots with a light seed starting mix. Seeds should be planted at a depth of about a quarter inch, ensuring they are not too deep. Label each container with the variety name for easy identification.
As your chili plants grow, consider spacing them adequately. Crowded plants often lead to poor air circulation, inviting diseases. Keep the plants about 18 to 24 inches apart. This distance allows each plant enough room to thrive. In home gardening, healthy spacing contributes to robust vegetable gardening practices.
Employing organic gardening techniques can significantly enhance growth. Natural fertilizers, such as fish emulsion or seaweed extract, provide nutrients without chemicals. These sustainable practices not only feed your plants but also support beneficial soil life. Regularly check for pests and diseases. Early intervention can save your harvest.
As the season progresses, pay attention to sunlight needs. Most chili plants love full sun, requiring at least six hours of direct light daily. Ensure they are positioned in a sunny spot in your garden. Rotate your planting areas each year to maintain soil health. This method works well for preventing pests and diseases.
Noticing the blooms is key to maximizing yield. Flowers indicate that fruits will soon follow. Regularly harvesting your chilis encourages more blooms, leading to greater production. For those wanting unique flavors, experimenting with heirloom seeds can yield interesting results. Each variety has its characteristics, adding diversity to your crops.
In summary, saving seeds is just the start. By following these gardening tips, you can cultivate a thriving chili garden next season. Observing the growth process closely will enhance your skills. The effort put into preparation and care pays off with a bountiful harvest of flavorful chilis.
Final Thoughts on Seed Preservation
Saving seeds from your chili plants is more than just a practical step for next year’s garden. It represents a commitment to sustainable gardening practices. By preserving seeds today, you help maintain a diverse array of plant varieties for future generations. This act of cultivation not only allows you to enjoy your favorite flavors year after year but also promotes biodiversity within your local ecosystem.
Think about the unique characteristics of each chili variety you grow. Each seed holds the potential for flavors and experiences that enrich our meals and connection to nature. Your efforts contribute to a larger cause — supporting resilient gardening systems that can adapt to changing environments.
Embracing the cycle of plant propagation can be rewarding. When you save seeds, you engage in a tradition that goes back generations. This simple act connects you to the roots of gardening culture, allowing you to be part of a larger community that values both nature and culinary diversity.
So, as you harvest those seeds, remember you’re doing more than preparing for next season. You’re actively participating in a way to preserve culinary heritage. Keep these gardening tips in mind, and feel encouraged to explore the many flavors and varieties that exist. By doing so, you help ensure a rich and varied garden for years to come.